
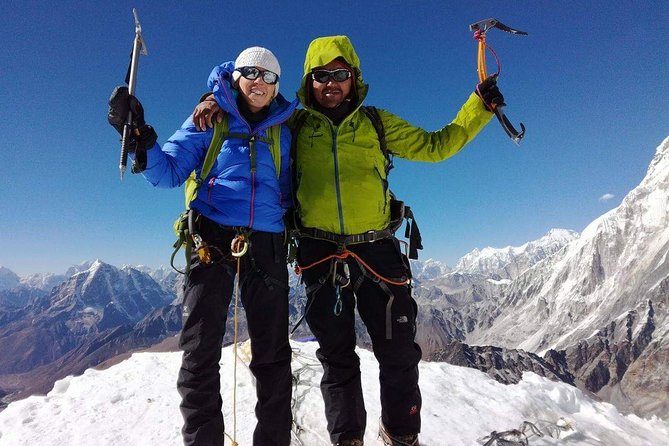
Reviewed · PEAK CLIMBING
Kyajo Ri Peak Climbing
Kyajo Ri Peak climbing is interesting because you get a real high-altitude summit push in the Khumbu world, with a big cast of famous neighbors like Everest, Lhotse, Makalu, Cho Oyu, Baruntse, and Ama Dablam in the same line of sight. I love the step-by-step acclimatization plan, with multiple rest days that give your body a chance to catch up. I also love the daylight summit strategy, starting early so you can aim high before afternoon winds can ruin the plan.
One consideration before you book: this is not a “walk up a hill” experience. You’ll hit technical climbing with fixed ropes and crampons on the upper stages, and your summit chance depends on conditions and timing after you leave Camp II.
Key things that make this climb worth your time
- Kyajo Ri summit at 6,186 meters with views of Everest, Lhotse, Makalu, Cho Oyu, Baruntse, Ama Dablam, and more
- Sherpa support plus porter help, with a guide and one porter for every 2 people
- Multiple acclimatization checkpoints at Namche, base camp, Camp I, and Camp II
- Scenic flights via Lukla, Kathmandu to Lukla and back (weather can affect schedules)
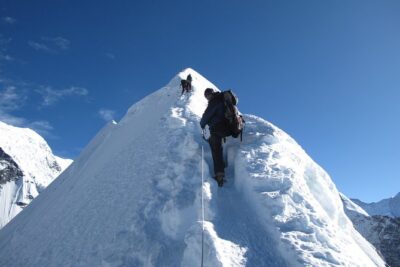
- Technical upper route, using fixed ropes and crampons for rocks and glaciers
- Private group format, just your group participating
Kyajo Ri Peak: the 6,186m summit with the Everest crowd in your pocket
Kyajo Ri sits in the Everest region, so you’re never climbing in isolation. The itinerary is built around that idea, especially near the summit window. On summit day, the goal is to move fast and safely to the sharp top, then come down while the route is still calm enough for most teams to manage.
What I like here is the focus on views as a payoff. You’re not just “doing elevation.” You’re doing elevation with a route that repeatedly frames the world’s big names. The upper camps are positioned so you’re regularly looking across glacial lakes and peak walls, not stuck hiking through fog and gray.
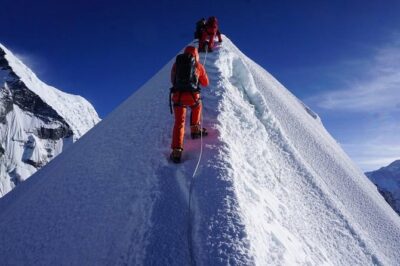
And yes, this is a serious climb. You’re trained and equipped for the technical pieces. The upper part includes sections over rocks and glaciers where fixed ropes and crampons are part of the plan. That matters because it changes what you need mentally and physically. You should be ready for teamwork, careful footwork, and moving with purpose.
More trekking peaks with guided ascents:
- Mera Peak Climbing
★ 5.0 · 33 reviews - Island Peak Adventure
★ 5.0 · 15 reviews - Everest Base Camp Trek with Island Peak Climbing
★ 5.0 · 14 reviews
Kathmandu to Lukla: the flight that sets the whole tone
This trip uses scenic flights: Kathmandu to Lukla, then Lukla back to Kathmandu. Lukla is the gateway to the Khumbu region, and arriving there gives you that early reminder that mountains run the schedule, not the other way around.
Here’s the practical reality: flights can be delayed or cancelled due to weather. One climber shared that their plane to Lukla was cancelled, then they flew the next day. So build your mindset around flexibility. If you hate uncertainty, it helps to treat weather delays as part of the system you’re entering, not a failure of planning.
Also, the trip structure gives you a buffer. You don’t just fly and immediately sprint into a summit bid. You arrive, get settled, handle prep, and then start trekking.
Your Kathmandu setup: hotel, paperwork, and a smart start to the mountains
Day 1 is about smooth landing mechanics. You’re met at Tribhuvan International Airport, transferred to a Kathmandu hotel, and supported through check-in. If you want to get oriented, there’s also an option to visit the company office for trip info.
Day 2 is where you set the foundation. You spend time sightseeing in the Kathmandu Valley UNESCO sites, but you don’t need to cram everything. The plan specifically notes that you’ll likely pick about 3 to 4 places based on time and logistics. That’s a good sign. It means you won’t spend your “pre-climb” day sprinting from one ticket line to the next.
You also complete the needed paperwork and preparations for Kyajo Ri. That kind of admin day is boring on paper, but it prevents stress later. When you’re climbing at altitude, stress is not your friend.
There’s also a welcome dinner on Day 1. Food and calm social time matter more than people think, especially when you’re about to trek and camp for days.
Dudh Koshi trail to Namche: forests, suspension bridges, and Sagarmatha National Park
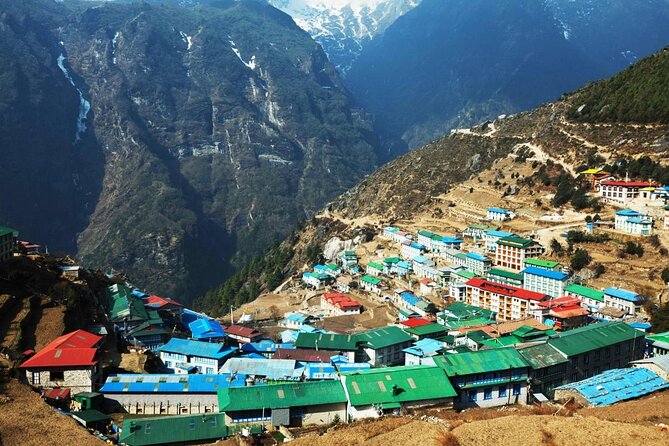
The trek starts after flying into Lukla. On Day 3, you pass through Sherpa villages and walk along the left bank of the Dudh Koshi River. Expect a mix of scenery: rhododendron forest, pine sections, and painted mani walls. The walking feels like a warm-up, but don’t treat it as easy. The altitude adds up even in the early days.
Day 4 continues with that classic Everest-region pattern: suspension bridges, small settlements, and river crossings. You’ll cross the river again and again, and you’ll head through forested areas until you reach the Sagarmatha (Everest) National Park entry post for registration.
Then you climb into Namche Bazaar, the Sherpa capital. This is an important moment. Namche is where the trek becomes a real altitude story. By now you’re above 3,000 meters, so you’re not just sightseeing anymore.
More to compare around Kathmandu
- Everest Base Camp Trek – 14 Days
★ 5.0 · 1,499 reviews - Everest Base Camp Trek
★ 5.0 · 842 reviews - Private Kathmandu Sightseeing Tour | UNESCO World Heritage sites
★ 5.0 · 756 reviews - Kathmandu: 7 UNESCO Sites with Lunch
★ 4.8 · 744 reviews
Namche acclimatization day: what you do matters as much as what you rest
Day 5 is a rest day at Namche Bazaar, and that’s exactly what you should want. Acclimatization is framed as crucial here to avoid mental and physical issues and to set you up for summit success.
The best part is that you don’t just sit. You explore Namche, and you can choose from acclimatization hikes with strong views. Two specific options are built in:
- A hike up to Khunde Hospital, set up by Sir Edmund Hillary
- A climb toward Syangboche for wide views of Everest, Lhotse, Cho Oyu, Nuptse, Thamserku, Kusum Kanguru, and Ama Dablam
If you’re the type who needs movement to feel okay, Namche is a smart place to do it. If you’re the type who needs to save energy, Namche still works because you have flexibility. Either way, keep the key acclimatization rule in mind: go “up” during the hike, then come back down to sleep.
Bhote Khosi Valley and Mende: waterfalls, trading-route history, and a quieter climb
On Day 6, the trek turns west as you head into the Bhote Khosi Valley, described as a popular trading route into Tibet. That historical flavor is more than trivia, because it also explains why the path has a lived-in feel, with villages and established trails.
You get good views of Kwangde Peak on your left, and you’ll walk past cascading waterfalls. The route keeps mixing forest walking and climbing. You’ll move through dense rhododendron forest, turn toward the hamlet of Thamo area, then climb steeply for about an hour toward Mende, where you sleep.
Mende is a useful stage because it’s not as “busy” as Namche. You transition into a more remote rhythm, which helps your body and your mind settle into the pace.
Kyajo Drangka and base camp: where Sherpas set up your climb reality
Day 7 is a bigger shift. You leave Mende and follow a faint yak trail over passes into Kyajo Drangka, described as an isolated broad valley south of Kyajo Ri. Isolation here matters. It usually means fewer distractions, more consistent team time, and more focus on altitude.
Views expand again: Thamserku, Kusum Kangaru, Kwangde Peak, Parchamo Peak, plus other snow-capped neighbors. Then you reach summer yak pasture ground and set up base camp.
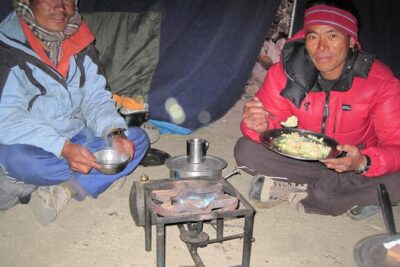
At base camp, the Sherpa crew does more than just carry gear. The itinerary specifically emphasizes that they set up camp and check equipment, including preparations for higher camps. That’s important for you as a climber. When someone takes time to verify ropes, crampons readiness, and camp readiness, your summit day starts with fewer surprises.
Day 8 is another acclimatization rest day at base camp, already above 4,500 meters. You explore around camp with hikes that offer mountain views, while the crew checks your climbing gear again and keeps an eye on readiness.
Camp I and Camp II: the altitude jumps you can actually manage
On Day 9, you climb to Camp I at 5,200 meters. The route goes over grassy spurs and boulders, then along a steep rocky trail. The camp placement comes with big rewards: views of Kyajo Ri Peak and pristine glacial lakes. That matters because at this altitude, you’ll often need mental anchors. Seeing the route you’ll climb makes the hard days feel more connected.
Day 10 is rest and acclimatization at Camp I. It includes hikes with good view options, plus crew checks of health conditions and climbing equipment needed for the Kyajo Ri summit climb. That combination, rest plus monitoring plus gear checks, is exactly what you want for a route like this.
Day 11 moves into the technical zone. You climb over rocks and glaciers to reach Camp II at 5,700 meters. This is where fixed ropes and crampons become part of the job. You should expect a workday feel, not a sightseeing stroll. Your team’s discipline is what keeps you safe and keeps the route moving.
Once you reach Camp II, camp setup happens quickly and preparations begin for the final summit push.
Summit day before noon: fixed ropes meet fast decisions
Day 12 is your summit day. You start early, with the plan to reach the top before noon. The reason is practical: strong winds after midday can create barriers that make reaching the summit impossible.
This is one of those details that tells you a lot about the climbing culture. They’re not selling a guaranteed top. They’re planning for changing mountain conditions and making decisions based on safety and weather.
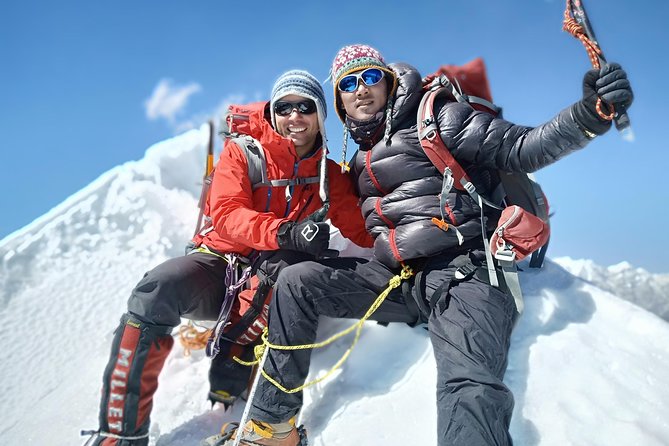
When you reach the summit, you spend short quality time at the top, then start the descent back to Camp II. The views are the payoff: Everest, Lhotse, Makalu, Cho Oyu, Baruntse, Ama Dablam, and surrounding high peaks. Even if your legs are screaming by then, those names give you a real sense of why the whole effort was worth it.
Coming down after you summit: the harder part is still ahead
The climb down is still work. Day 13 begins with easing off after breakfast, then retracing your steps from Camp II back down through Camp I to base camp.
Day 14 continues down from base camp through Mende and into sub-tropical forested areas with rhododendron trees. The trek feels easier on paper, but your legs may still feel heavy after multiple nights at altitude. Focus on careful footing and steady pacing. Descents can be tough on knees and stamina.
Day 15 is the final trek section from Namche Bazaar to Lukla. You’ll walk through dense rhododendron forest with some short uphill climbs, then down toward the Bhote Koshi River, crossing it three times. The last uphill climb is about 45 minutes back to Lukla, followed by a team celebration.
This is a great day to remember how the whole program works: you climb, acclimatize, climb again, summit, then get yourself back down into more forgiving air.
Lukla to Kathmandu, plus a real Kathmandu evening
After your last big trek day, Day 16 brings you back via early morning flight from Lukla to Kathmandu. Once you land, you get transferred to the hotel.
If you want more culture time, this is when you can revisit Kathmandu UNESCO sites you couldn’t cover on the second day. There’s also a nod to Thamel market streets, where you can walk around, eat, and decompress.
Day 17 ends the experience with an airport representative drop-off at the International Airport, based on your flight schedule.
Price and logistics: what you’re actually paying for at $3,350 per person
At $3,350 per person for about 17 days, the price is high, but it includes more than most casual trips. Here’s what you’re getting included:
- Meals (breakfast, lunch, dinner) and accommodation as the itinerary lays out
- All taxes, national park fees, and handling charges
- A professional guide plus one porter for every 2 people
- Hotel pickup and drop-off
- Mobile ticket
What’s not included is equally important:
- Personal climbing gears
- Personal insurance
- Alcoholic beverages
- Personal expenses
- Tips for staff
This is where value comes down to your situation. If you already own proper technical gear and can handle the insurance piece, your out-of-pocket costs may stay manageable. If you need to buy crampons, a system of harness and safety gear, and other climbing-specific items, you should budget for that before you commit.
Also think about porter support. One porter for every two people can make the trek and camp phases feel more doable, because at altitude, fatigue and risk add up fast when everyone is overloaded.
Private tour format helps too. It’s not a giant group shuffle. You’re moving as one unit, with the schedule built around your team.
One more logistics note: the trip requires a current passport, and at booking time you need passport name, number, expiry, and country. If you hate last-minute document hassles, this is one reason to get your paperwork done early.
Who should take this Kyajo Ri climb, and who should pause
This experience is best for people with strong physical fitness. The itinerary repeatedly reinforces acclimatization and technical climbing readiness, and the upper camps require fixed ropes and crampons.
You’ll be a good fit if you want:
- A real climb with a summit attempt at a high altitude (6,186m)
- Structured acclimatization, not just “push through”
- Expert Sherpa crew support, with specific emphasis on camp setup and equipment checks
- A chance to experience Sherpa culture through the route’s villages and daily rhythm in the Everest region
You should think twice if:
- You’re uncomfortable with technical terrain and the idea of rope work and crampons
- You’re very sensitive to altitude and dislike the discipline of rest days
- You rely on perfectly timed flights, because Lukla weather can change the plan
FAQ
FAQ
What altitude is the Kyajo Ri summit?
Kyajo Ri summit is at 6,186 meters.
How long is the trip?
The duration is listed as about 17 days.
Where does the trip start and end?
It starts in Kathmandu (meeting point in the Kathmandu Valley area) and ends back at the same meeting point.
Is there airport pickup and drop-off?
Yes. Hotel pickup and drop-off are included, and an airport representative drop-off is provided at the end.
Are flights included?
Yes. The trip includes scenic flights between Kathmandu and Lukla, and back to Kathmandu.
What is included in the price?
Included are meals and accommodation as per the itinerary, taxes and national park fees, professional guide and porter support (one porter for 2 people), and hotel pickup and drop-off.
What is not included?
Not included are personal climbing gears, personal insurance, alcoholic beverages, personal nature expenses, and tips for staff.
Do I need a passport, and when do details matter?
A current valid passport is required. Passport details like name, number, expiry, and country are required at booking.
Is this a private group?
Yes. It is a private tour/activity, with only your group participating.
What is the cancellation timeline for a full refund?
You can cancel up to 24 hours in advance for a full refund.
Should you book Kyajo Ri Peak Climbing?
I’d book this if you want a structured, Sherpa-supported summit attempt at 6,186 meters, with acclimatization built into the schedule and a clear plan for technical climbing above Camp I. The value feels strongest when you already know how to budget for personal gear and insurance, and you’re okay with the real-world truth that Lukla flights depend on weather.
Pass on it if you’re looking for a casual trek, or if fixed ropes and crampons scare you more than they excite you. This one is a climbing trip first, and a view trip second. If you’re ready for that trade, Kyajo Ri can be an unforgettable way to see Everest-region giants up close.
Latest Kathmandu write-ups
- Langtang Valley Trek★ 5.0 · 3 reviews
- Khopra Danda Trek★ 5.0 · 3 reviews
- Langtang Valley Trek from Kathmandu★ 5.0 · 3 reviews
- 5 night / 6 days Kathmandu Nagarkot Chitwan Pokhara tour★ 5.0 · 3 reviews
- Nepal Highlights Tour: 5 Nights 6 Days Kathmandu & Pokhara Tour★ 5.0 · 3 reviews
- Kathmandu Valley Private Day Tour★ 5.0 · 3 reviews
- Conquer the Himalayas: The Ultimate 16-Day Annapurna Circuit Trek★ 3.5 · 3 reviews
- Kathmandu Heritage Day Tour★ 5.0 · 3 reviews
Peak Climbing, compared.
Everest Base Camp Trek with Island Peak Climbing
Read our review →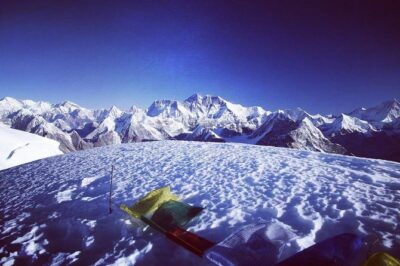
Browse the lists this tour appears in